- Alvord Unified School District
- Office 365 OneDrive
- Share a spreadsheet, document, presentation, or notebook in OneDrive
Office 365
Page Navigation
- What is Office 365?
-
Training and Professional Development
- Courses
- Resources
-
Quick Tip Videos
- Co-Author a Lesson with Teachers Using OneDrive Yammer and Office 365
- Create infographics using Powerpoint
- Office 365 vs. Office 2013
- OneNote for Individualized learning
- Save time with Outlook
- Share assignments, homework, quizzes and more using Class Notebook
- Using Staff Notebooks to Improve School Efficiency
- Stay informed and connected to colleagues with a SharePoint Team Site
- Create a notebook for each subject, co-author lessons and share student work using OneNote
- Share Student Assignments Securely Online or Offline Using OneDrive
- Share Notebooks with Students and Protect Sections in OneNote
- Use Site Folders in OneDrive to Easily Organize Courses and Communicate with Students
- Office 365 Word
- Office 365 Excel
- Office 365 Powerpoint
- Office 365 OneNote
- Office 365 OneDrive
- Sign in to Office 365
- How to sign in for the first time
-
Share a spreadsheet, document, presentation, or notebook in OneDrive
Your Office document is stored on OneDrive. Now share it with your friends, or with the world.
-
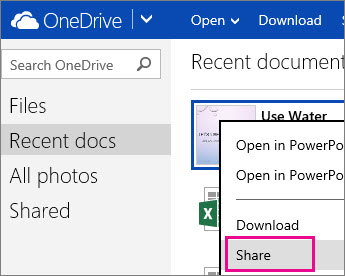
Go to your OneDrive, and right-click the document, and then click Share.
-
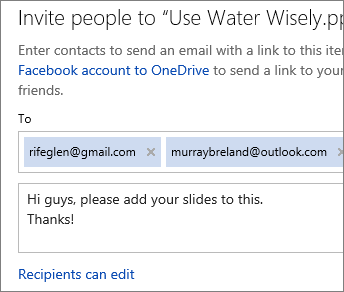
Type the email address of the person you want to share with. Press ENTER between multiple addresses. When you click Share your message includes a link to the document.
Get a link you can copy and paste
If you don't know the person's email address, or if you want a link that will let people edit your document without having to sign in, click Get a link after you click Share. Then click Create link for a link that you can copy and paste.
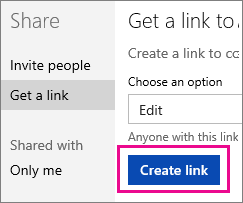
TIP If you’re pasting in a tweet, or if the URL just seems too long, click Shorten, and then copy it.
Share for viewing only
If you want people to see your doc without editing it, you can share it as view-only.
With an email invitation
In the invitation, click Recipients can edit, and then switch to Recipients can only view.
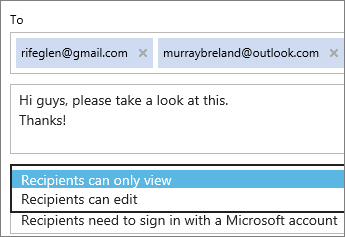
NOTE If you want to restrict who can see the document, click Recipients don’t need a Microsoft account, and then switch to Recipients need to sign in with a Microsoft account.
With a view-only link
After you go to Share > Get a link, click Edit and switch to View only before you click Create link.
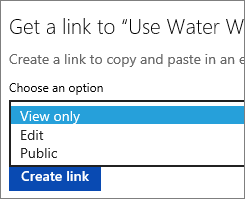
NOTE If you want to open up view-only access to your document so that people can find it when they search the web, click Public instead of View only.
-

