- Alvord Unified School District
- Office 365 OneDrive
- Upload files to a library
Office 365
Page Navigation
- What is Office 365?
-
Training and Professional Development
- Courses
- Resources
-
Quick Tip Videos
- Co-Author a Lesson with Teachers Using OneDrive Yammer and Office 365
- Create infographics using Powerpoint
- Office 365 vs. Office 2013
- OneNote for Individualized learning
- Save time with Outlook
- Share assignments, homework, quizzes and more using Class Notebook
- Using Staff Notebooks to Improve School Efficiency
- Stay informed and connected to colleagues with a SharePoint Team Site
- Create a notebook for each subject, co-author lessons and share student work using OneNote
- Share Student Assignments Securely Online or Offline Using OneDrive
- Share Notebooks with Students and Protect Sections in OneNote
- Use Site Folders in OneDrive to Easily Organize Courses and Communicate with Students
- Office 365 Word
- Office 365 Excel
- Office 365 Powerpoint
- Office 365 OneNote
- Office 365 OneDrive
- Sign in to Office 365
- How to sign in for the first time
-
Upload files to a library
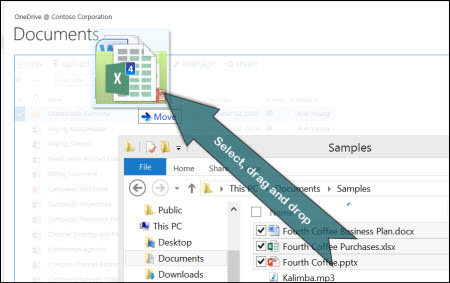
You can upload files, to your OneDrivee, by just dragging them from your computer. First, open OneDrive or the site library. Then find the documents that you want to upload in File Explorer and drag them to the space in the library where it says drag files here. For a demonstration, see Video: Adding documents to a library.

NOTE If you don’t see the option to drag and drop files, update your copy of Office.
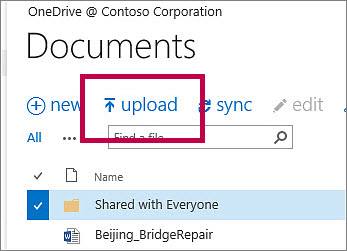
Instead of dragging files, you can select Upload.

In the Add a document dialog box, you can click Browse to upload an individual file or click Upload files using Windows Explorer instead to upload multiple files. If you choose the Explorer option, you can drag files from your computer into the File Explorer window. This option is easier to use if you open File Explorer first.
Click here to go back to OneDrive page.

