- Hillside School
- Art Grade 1
-
Here are some cool lessons for you to learn art at home.
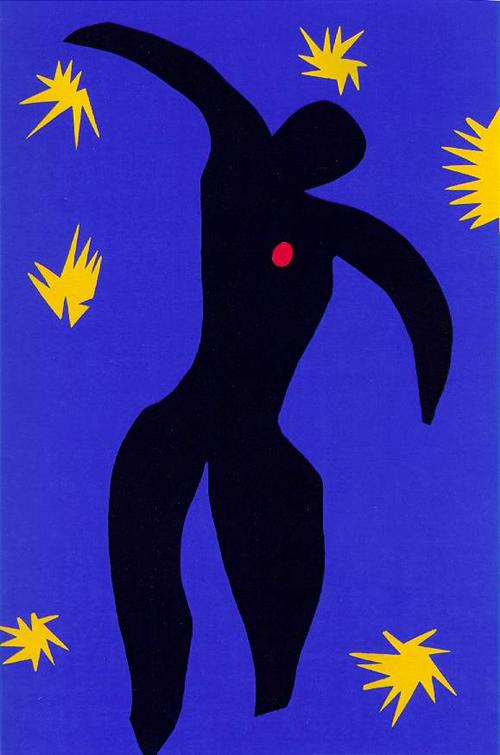 "Icarus-Jazz" (1947) by Henri MatisseWatch lesson 1, then:- Draw a landscape starting with the horizon line.- Add objects such as trees, rivers, the Sun and so on.- Remember, close to you (below the horizon line) objects are bigger.- Away from you (on the horizon line) objects are smaller.- By doing that, you will create space on your landscape.- Make sure you add color to everything. The horizon line splits the sky from the ground. Therefore, the ground should be colored all the way to the horizon line.- Do the same with the skies, color everything and save it.
 Watch Grayscale Lesson 2, then:- In a blank piece of paper, draw a long rectangle (use a ruler, if you have one).- Divide the rectangle in 10 (ten) equal parts, creating a 1-10 scale with 10 boxes.- With a sharp pencil, holding it sideways, start gently coloring #2 spot on your scale.- Increase hand pressure as you change to a higher box number.- The last box (#10) should be your darkest one.- Save it. We will use our grayscale as a reference for our next project.
 Watch Lesson 3, then,- Draw a 3D house with a pencil starting with a square. See picture below:
 - After you draw your house, add a few features such as door, windows and whatever you wish.- Draw a line on the ground for your house, then draw a Sun on the sky, opposite to the house.- Use your grayscale as a reference and color the walls of the house using darker numbers away from the Sun and lighter numbers on the sides of the house that are closer to the Sun.Have fun!- Watch lesson 4, then:- Start a new landscape drawing with a large 3d house at the bottom of the page.- Place a middle size 3D house slightly above your big house, to create space between the two houses. (If you don't remember how to draw a 3D house, check lesson 3).
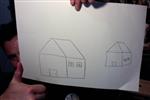 - Draw a horizon line at the background and add a little 3d house on the line.- Add whatever you would like to add, but remember that big things by the big house, middle size things by the middle house and small things by the horizon line. Have fun!*To doodle means to draw without thinking too much, like just drawing anything to fill in the time.Watch Lesson5 and Mr Doodle, then:- Find black markers and start doodling.- A happy face is a great way to start.- Then, draw another happy face but with different eyes.- A little change on the shape of the head or the nose can also help you move along with your doodling.- Feel free to draw anything you want.- Fill up some areas with black and you can make many variations of the same doodle drawing.- Let's go and have some fun because doodling is fun!Check also this video:
 April 22nd is Earth Day! Go outside and celebrate our planet!Watch the movie above, then:- Get a camera (or an iphone, ipad) and go outside.- Search for something that is similar to your first initial.- Remember, we artists have to always look at everything very carefully to discover ways to create our art.- Look carefully and you will find it.- Check this samples here: The Alphabet- Have fun and do not forget to send me your picture.Watch Henri Matisse, then, watch:After watching Mati and Dada and Matisse lesson 7, start your project.You will going to create your own Matisse-style cutout.- Find a piece of paper and draw organic shapes, remember from the movie, organic shapes are shapes that remind you of nature.- You can draw on white paper or colored paper.- If you do not have colored paper, color white paper with markers, crayons, or paint.- Cutout your shapes and place on a background paper.- Before gluing to the background paper, arrange/organize your cutout on the background paper the way you wanted to look.- Glue your organic shapes to the paper to create your cutout artwork.- Do not forget to fill out the form Kndergarten Week 7. Scroll down:Watch the lesson above, then:- Get a camera (iPhone, iPad).- Find some wood to create a frame.- If you do not have wood for a frame, improvise your frame with anything you wish.- Remember, you are the artist. Be creative!- Go outside and choose your surface area (ground area).- Throw a stick up in the air to find a random place on your area (surface).- Place your frame on the ground area of your choice and take a picture.- Take a picture of what is inside your frame. That's your artwork!- Send me a picture of your artwork.Check this video to learn more about the Boyle Family: Boyle Family-Tate- Watch the video to learn about the incredible art of Christo and Jeanne-Claude.Watch the lesson, then:- Find some string and fabric. Use a solid color, no patterns. - You can improvise with any fabric such as an old t-shirt.- Find something (a subject = a thing) you want to wrap.- Wrap the fabric around your subject and then, tie it with the string. Wrap the string several turns around the fabric.- You can create a big, huge wrap or a small one.- You are the artist, you decide it!- If you need, use tape to hold the string in place.- Do not let the tape show up, try to hide it.- When you finish with your wrapping art, look from all different sides.
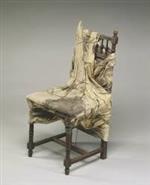
 On May 31st, 2020, we lost Christo, from our lesson 9. He passed away of natural causes at his home in New York, he was 84 years old.- Find you favorite view and take a picture.Watch Lesson 10, then:- Find things that you can use to build a face.- Arcimboldo painted several faces looking at different things, such as vegetables, flowers, plants, animals, fish and even books.- Be creative and find your things to build your own Arcimboldo.- Similar to Lesson 10, you can build your own Arcimboldo with fruits and vegetables.- Remember, you are the artist. Be creative!- You can build an Arcimboldo with anything you want.- You can use toys, books, kitchen utensils, fruits, vegetables, food, snacks and so on.- You can also go outside and look for sticks, plants, flowers, bugs, you choose it!- Arcimboldo created his faces with the most unusual things.- When you finished your Arcimboldo face, take a picture and send it to msouza@allendalek8.com
Museum Mile Day-Tuesday 6/9/20 from 6:00 am to 9:00 pm
Directions:
- You need aluminum foil, paper, markers and scissors.
- Draw an ocean scene in a piece of paper: some fish, jelly fish, seaweed, and so on. You are the artsit, be creative.
- When you finish your drawing, color everything but the water.
- Cut out a piece of aluminum foil the same size of your paper.
- Holding the marker sideways, with the broad part of the tip, color the dull size of the aluminum foil with blue.
- Take your paper, carefully place it face-down over your colored aluminum foil.
- Rub your hand and fingers applying pressure all over the back of the paper. The color from the aluminum foil will print onto your drawing.
- Repeat the process for darker print.
- Now that you know how to do, create your own version of Foil Color Print.
Mr. Souza Doodle your Name - Week 14
Watch the lesson, then:
- Create a doodle with your own name.
- Write down your name, letter-by-letter.
- Write the first letter of your name in an extra big size.
- "Doodle that letter", that means, decorate the letter with eyes, mouth, teeth, nose, moustache, hair, arms, face, whatever you feel like doodling.
- Repeat the process with the next letter.
- Doodle all letters one-by-one until you are finished writing down your name.
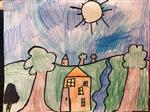
Here is a picture of a Landscape painting: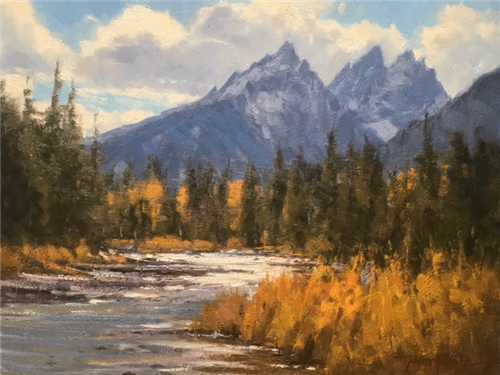 Remember:1- Start with the horizon line.2 - The horizon line is on the back, splitting the sky from the land.
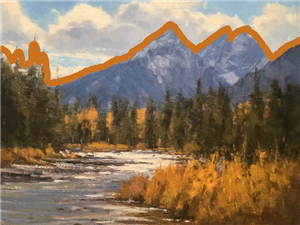 (The same landscape with the horizon line highlighted.)3 - Draw things bigger as you move below the horizon line and towards you (the bottom of the paper).4 - Draw things smaller as you move towards the horizon line.5 - Add color and have fun.

