- Home
- Our Classrooms
- Souza, Mauricio
- Art Grade 2
-
Here are some cool lessons for you to learn art at home.
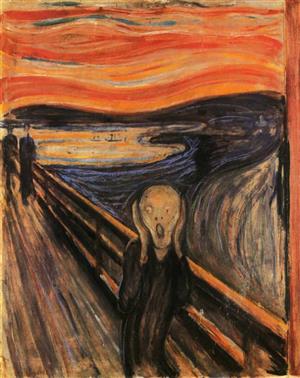 Edvard Munch and "The Scream" from 1893
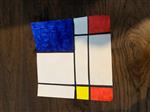
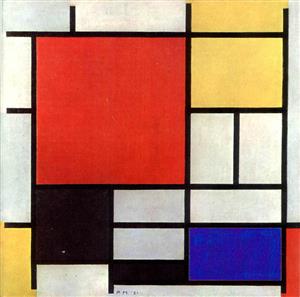 Piet MondrianWatch Lesson 1A, then:- Practice drawing lines with the ruler.- Hold the ruler in two different places and trace the line.- Do not let the ruler move when tracing.- Practice as much as you need to master using a ruler.
 Watch Lesson 1B, then:- Create your own Mondrian.- In a piece of white paper, trace a line acrross the paper.- Move the ruler slightly away from that first line to create two parallel lines in the same direction.- Keep doing it until you are satisfied with your control of the ruler.- Color in between the parallel lines (the two lines closed together).
 Watch Lesson 1 Final, then:- Color you Mondrian. Use primary colors, black on the lines.- Try to leave some white space on your Mondrian's composition to create balance.
 Watch Lesson 2, then:- Place a white piece of paper on a flat table.- Using your ruler, draw a square on the middle of your paper (4 x 4 inches is a great size!).- Away from the paper, mark a spot with an eraser, a buttom or something small.- Pointing the ruler in that direction (of your small object), trace short lines (about 2 inches).- Trace 3 (three) lines only, each line starting at the corner of your square (corners of a square are called "vertex").- Connect the three lines with one line on the top and another on the side.- You will finish up with a 3D cube.- Shade two sides of your cube to create volume.
 Watch lesson 3, then:- Build a grayscale by drawing a long rectangle and splitting the rectangle is 10 boxes/parts.- Number below each box from 1-10.- Leave #1 blank.- Start with box #2, use a sharp pencil very lightly and fill the box.- Then, keep moving to the next box and increase pencil pressure to make each box slightly darker than the one before.- Your last box, #10 will be your darkest one.- Build a cube like the one from last lesson.- Shade one side of the with #7-8 of your grayscale.- On the top of the cube, use a #2-3.- On the fron of the cube, use a #4-5.- Create a shadow of your cube with #10.- Remember, your light source is always opposite to you shadow.Watch both videos, then:- Draw your Giza pyramids in a paper starting with a single triangle. (Your drawings will look very good with the use of a ruler)- Add two triangles of different sizes. One on each side of your big triangle.
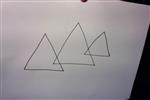 - Erase the lines on the two places the triangles intersect with each other(intersect=place they meet).
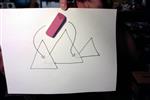 - Add on line going down from the top towards the bottom of each triangle.- Stop when you reach another triangle.- Your first one will have a diagonal line going backwards, like we did with the cube.
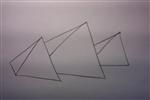 - Using your grayscale knowledge, shade the opposite sides of the pyramids that faces your Sun and draw a horizon line on the background.- Decorate and color it. Have fun!
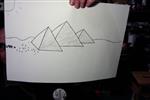 Answer:The greatest pyramid of Giza is called the Pyramid of Khufu also know as Cheops.*To doodle means to draw without thinking too much, like just drawing anything to fill in the time.Watch Lesson5 and Mr Doodle, then:- Find black markers and start doodling.- A happy face is a great way to start.- Then, draw another happy face but with different eyes.- A little change on the shape of the head or the nose can also help you move along with your doodling.- Feel free to draw anything you want.- Fill up some areas with black and you can make many variations of the same doodle drawing.- Let's go and have some fun because doodling is fun!Check also this video:
 April 22nd is Earth Day!Here goes a lesson celebrating our planet.Watch the lesson above, then:- Get a camera (iPhone, iPad).- Find some wood to create a frame.- If you do not have wood for a frame, improvise your frame with anything you wish.- Remember, you are the artist. Be creative!- Go outside and choose your surface area (ground area).- Throw a stick up in the air to find a random place on your area (surface).- Place your frame on the ground area of your choice and take a picture.Check this video to learn more about the Boyle Family: Boyle Family-TateMalevich by Mati & Dada - Week 7Watch Malevich by Mati & Dada, then watch my Lesson 7:After watching both movies, start you artwork.- First, choose the area that you want. It could be objects on top of a table, objects on the floor, a view of your room from a bunkbed, any place that you can look from a higher point of view. Make an "art plan" with random things.- Remember, this project is about the way you see and look at things.- Take a picture of your art plan, similar to what I did with my table.- Think like Malevich thought when he was in the airplane.- On a piece of white paper, look at your picture and re-create (draw) the shapes of the things from your picture. You can use the ruler for straight lines*.- Color the shapes on your picture.- Give it a title and send me a picture (with the tile).- Have fun!Watch the movie above, then:- This art project is about the way we look at the world and how we can transform our findings into art.- Get a camera (or an iphone, ipad) and go outside.- Search outside images, not inside. If you cannot go outside, look through your window and choose outside images.- Search for something that is similar to the letters of your name.Look at everything, the ground, playgrounds, trees, plants, driveways, sidewalks, and so on.- Remember, we artists have to always look at everything very carefully to discover ways to create our art.- Look carefully and you will find it.- Check this sample: The Alphabet- Have fun and do not forget to send me your picture.- Watch the video to learn about the incredible art of Christo and Jeanne-Claude.Watch the lesson, then:- Find some string and fabric. Use a solid color, no patterns. - You can improvise with any fabric such as an old t-shirt.- Find something (a subject = a thing) you want to wrap.- Wrap the fabric around your subject and then, tie it with the string. Wrap the string several turns around the fabric.- You can create a big, huge wrap or a small one.- You are the artist, you decide it!- If you need, use tape to hold the string in place.- Do not let the tape show up, try to hide it.- When you finish with your wrapping art, look from all different sides.
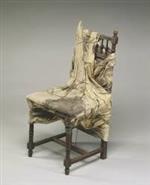
 On May 31st, 2020, we lost Christo, from our lesson 9. He passed away of natural causes at his home in New York, he was 84 years old.- Find you favorite view and take a picture.Watch Lesson 10, then:- Find things that you can use to build a face.- Arcimboldo painted several faces looking at different things, such as vegetables, flowers, plants, animals, fish and even books.- Be creative and find your things to build your own Arcimboldo.- Similar to Lesson 10, you can build your own Arcimboldo with fruits and vegetables.- Remember, you are the artist. Be creative!- You can build an Arcimboldo with anything you want.- You can use toys, books, kitchen utensils, fruits, vegetables, food, snacks and so on.- You can also go outside and look for sticks, plants, flowers, bugs, you choose it!- Arcimboldo created his faces with the most unusual things.- When you finished your Arcimboldo face, take a picture and send it to msouza@allendalek8.com
Mr. Souza Foil Color Print week 13
Museum Mile Day-Tuesday 6/9/20 from 6:00 am to 9:00 pm
Directions:
- You need aluminum foil, paper, markers and scissors.
- Draw an ocean scene in a piece of paper: some fish, jelly fish, seaweed, and so on. You are the artsit, be creative.
- When you finish your drawing, color everything but the water.
- Cut out a piece of aluminum foil the same size of your paper.
- Holding the marker sideways, with the broad part of the tip, color the dull size of the aluminum foil with blue.
- Take your paper, carefully place it face-down over your colored aluminum foil.
- Rub your hand and fingers applying pressure all over the back of the paper. The color from the aluminum foil will print onto your drawing.
- Repeat the process for darker print.
- Now that you know how to do, create your own version of Foil Color Print.
Mr. Souza Doodle your Name - Week 14
Watch the lesson, then:
- Create a doodle with your own name.
- Write down your name, letter-by-letter.
- Write the first letter of your name in an extra big size.
- "Doodle that letter", that means, decorate the letter with eyes, mouth, teeth, nose, moustache, hair, arms, face, whatever you feel like doodling.
- Repeat the process with the next letter.
- Doodle all letters one-by-one until you are finished writing down your name.
* Making straight lines with a rulerRemember:1 - Hold your ruler with more than one finger.2 - When you are tracing the line on the ruler, the pencil should always be touching the ruler.3 - Hold the ruler tight, using a little pressure, so it will not move while you are drawing.How to take a picture on a Chromebook
- Click the circle in the bottom-left corner of the screen, and click on the camera icon. If you don’t see it, search camera in the search bar.
- Click the camera icon to open the Camera app.

The Camera app should be on your first page of applications.
- To take a photo, tap the capture button, which looks like a grey and white circle surrounded by a blue line.
Tip: there is a timer which will give you 3 seconds to allow you to center your work and hold it as close to the camera without cutting off you work
How to insert your photo into an email
1. Open up your email and click compose. Write in the "To" my address: msouza@allendalek8.com
2. Click attach files at the bottom (the paper clip symbol)
3. Click on images and your picture will be there.
- Click on the picture and then click open.
- Now your picture is attached to the email.
- Click send it and I will receive your email with your picture.


